Online Repairing, Fixing and Meshing Service for CAD and CAE Models
Home page:
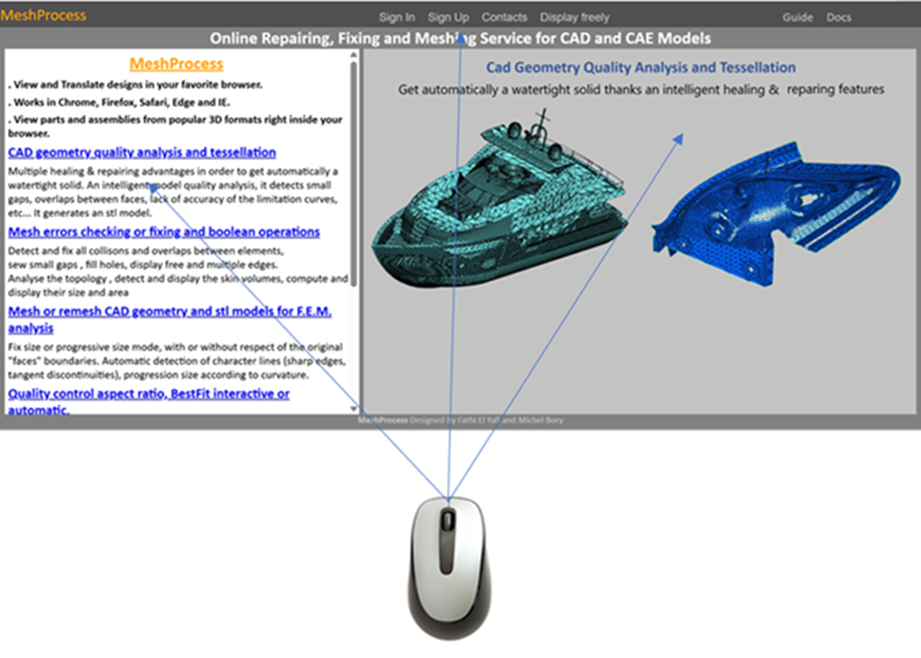
The home page summarizes the general philosophy of the MeshProcess application, as well as its main features.
The right-hand side displays a slideshow of examples that showcase the application's capabilities.
The horizontal menu at the top of the page allows users to access the following functions:
Sign In: The connection of any user with an account.
Sign Up: Allows the creation of an account which gives new users free unit credit, which allows them to upload their own models and explore the different features of the application. The only required information are the username, email address, and password; the others are optional.
Note : Initially, uploading large files may quickly deplete your credit.
Contacts: A panel appears inviting you to write us a message regarding the application.
Display freely: This option allows you to use the application without creating an account. It only allows viewing of medium-sized models, but all the functions in the left menu are disabled.
Guide: All user manuals published in html or pdf format.
Docs: All academic publications concerning problems of geometry healing and the generation of discrete models, in pdf format.
Menus:
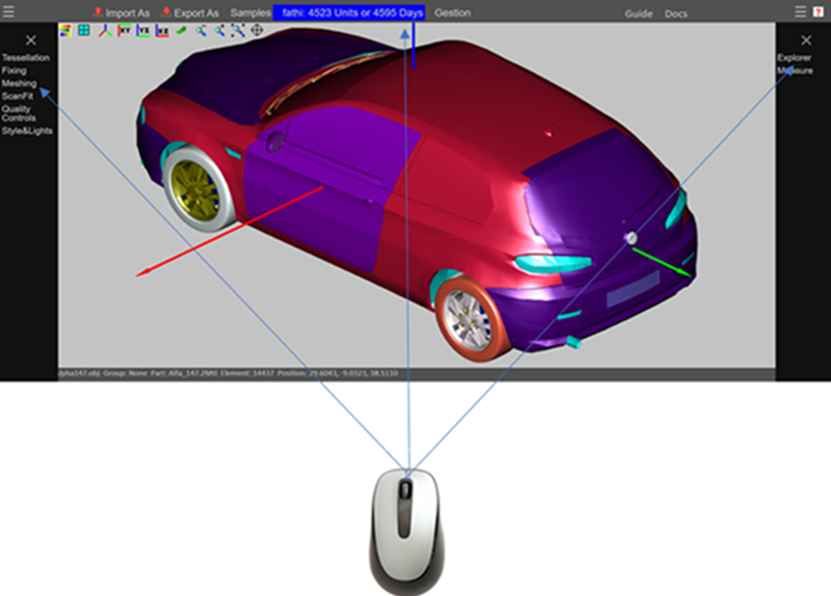
The application's main page allows the user access to all MeshProcess functionalities, provided that at least one model is loaded.:
Top Menu:
![]()
Import As:
CAD : .iges, .igs, .step, .stp, .brep
Design: .stl, .obj
CAE : .nas(Nastran BULK), .pc(PamCrash), .inp(Abaqus), .mesh(MeshGems).zip files for .mesh, stl or obj (multi-files)
.zip files for Nastran, PamCrash or Abaqus (include files).
Export As:
Design: stl, .obj.
CAE : .nas (Nastran BULK), .pc(PamCrash), .inp(Abaqus), .mesh (MeshGems).
Samples: A set of files, in all supported formats, are available to familiarize the user with MeshProcess.
User: The user blue button displays the remaining credit and its duration, and allows users to log out, reloading the credit, and modify their password and email.
Left
side menu ![]() :
It
provides access to all features that allow for the improvement of the loaded
model or the modification of its initial discretization. It also allows for the
visualization of the mesh quality according to several criteria, as well as
control of its graphical environment.
:
It
provides access to all features that allow for the improvement of the loaded
model or the modification of its initial discretization. It also allows for the
visualization of the mesh quality according to several criteria, as well as
control of its graphical environment.
Features:
1. Tessellation: Discretization of a loaded CAD model (IGES, Step).
2. Fixing: Checking and fixing a mesh defects (shape, overlaps, gaps, holes, collisions, etc.).
3. Meshing: Allow to mesh a CAD model or a discretized one.
4. Scan Fit: Allow to fit two different models, according to specific criterions.
5. Quality Controls: Allow to visualize the quality of the elements thanks to a color map according to three criterions, aspect ratio, warping angle and skewness.
6. Style & Lights: This section allows interaction with the model in order to modify certain attributes, such as the visibility of the reference, the color, the transparency and the light sources.
Note : Each menu has its own help section in the upper right corner.
Guide: All user manuals published in html or pdf format.
Docs: All academic publications concerning problems of geometry healing and the generation of discrete models, in pdf format.
Right
side menu ![]() :
The
functions in this menu allow you to explore the different parts of a model as a
whole or one of its components. The user can select, show or hide, and examine
the properties of components, take measurements, and check the continuity of a
mesh by examining the neighborhood of an element or node.
:
The
functions in this menu allow you to explore the different parts of a model as a
whole or one of its components. The user can select, show or hide, and examine
the properties of components, take measurements, and check the continuity of a
mesh by examining the neighborhood of an element or node.
Help
Menus![]() :
The
items in this menu provide more detailed information about the application's
menus.
:
The
items in this menu provide more detailed information about the application's
menus.
Explorer and mouse interactions:
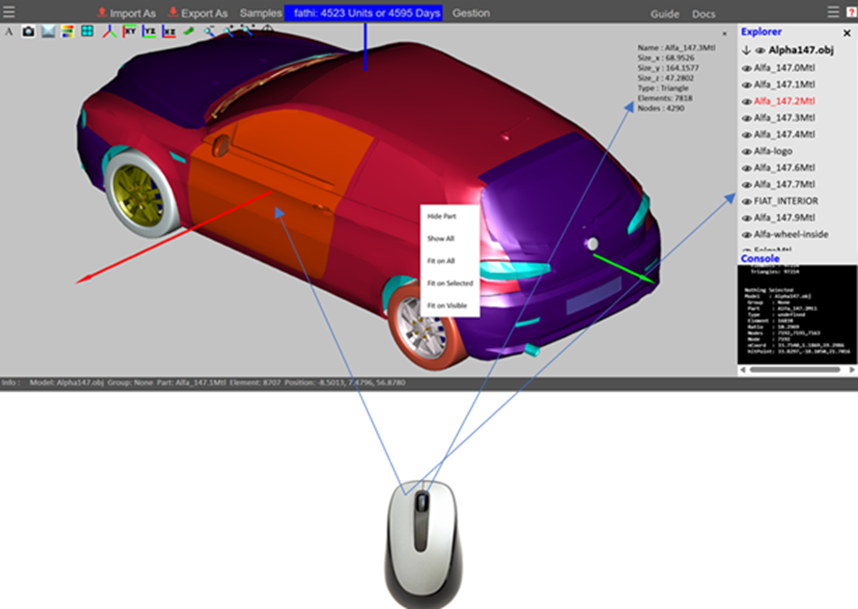
Explorer: The Explorer menu displays all the components of a model, geometric or discrete, imported or generated by the application. It supports multiple models.
Names: The component names as defined in the original file. Otherwise, the application assigns them a name based on their element type plus a unique identifier, for example, Tri_Part_#.
Arrow: Expend/Contract the model.
Eye: Visible/Hide the model or a part.
Left Button: Press: Selection of one or more parts of the current model.
Middle Button: Press: Displays the properties of the model or a part.
3d Canvas and mouse interactions:
This page deals in detail with the 3D interactivity between the mouse and all the behaviors provided by the application.
Mouse:
Move: When the mouse is in motion, the Info bar, located at the bottom of the page, displays the data corresponding to the mouse's position on the model.
Left Button:
Press: Selection of one or more parts of the current model. Same behavior in the Explorer. Each click on the model displays the properties of the location in the Console.Press + Drag: Activates the model's rotation mode, whose center of rotation is the center of the model's bounding box.
CTRL + Press: Change the center of rotation.
Middle Button:
Press: Displays the properties of the model or a part.
Press + Drag: Activates the model's translation mode.
Wheel: Zoom In/Zoom Out.
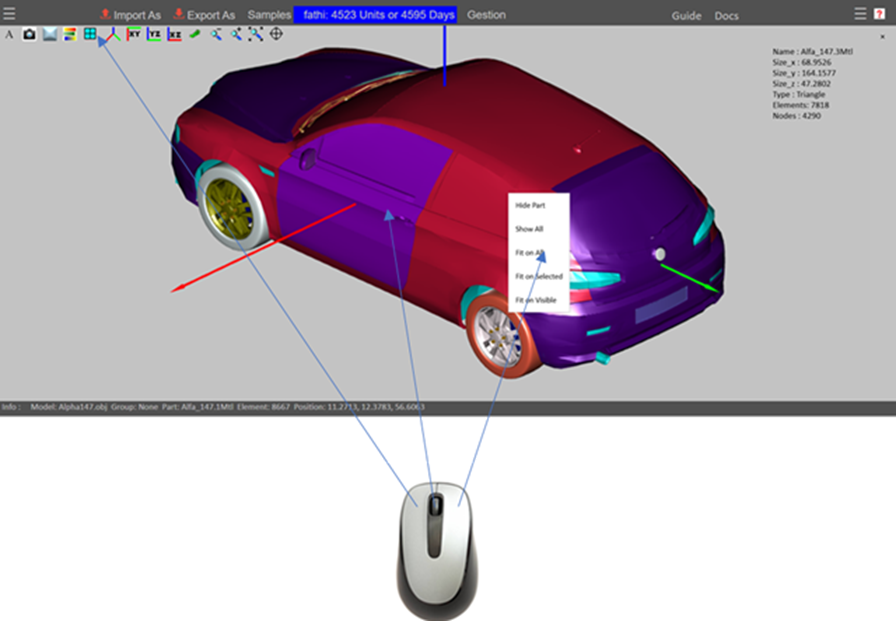
Right Button:
Press: Displays a context menu that offers several display options:
1. Hide Part
2. Show All
3. Fit on All
4. Fit on Selected
5. Fit on Visible
Bar Menu:
![]()
1. Animate
2. Snapshot, only the 3d canvas
3. Shading mode
4. Contours mode
5. Texturing mode (not available)
6. Wireframe mode
7. Axonometric view
8. XY view
9. YZ view
10. XZ view
11. Orthographic/Perspective
12. Zoom In
13. Zoom Out
14. Fit model to the screen
15. Fit to Selected